Conversion Service on Windows Server
Learn how to install and use the Conversion Service on Windows Server to automate document processes.
Get trial license
To try or fully use the Conversion Service, you must obtain a license key. To get the Conversion Service evaluation license key for free, follow these steps:
- Sign up or log in to the Pdftools Portal.
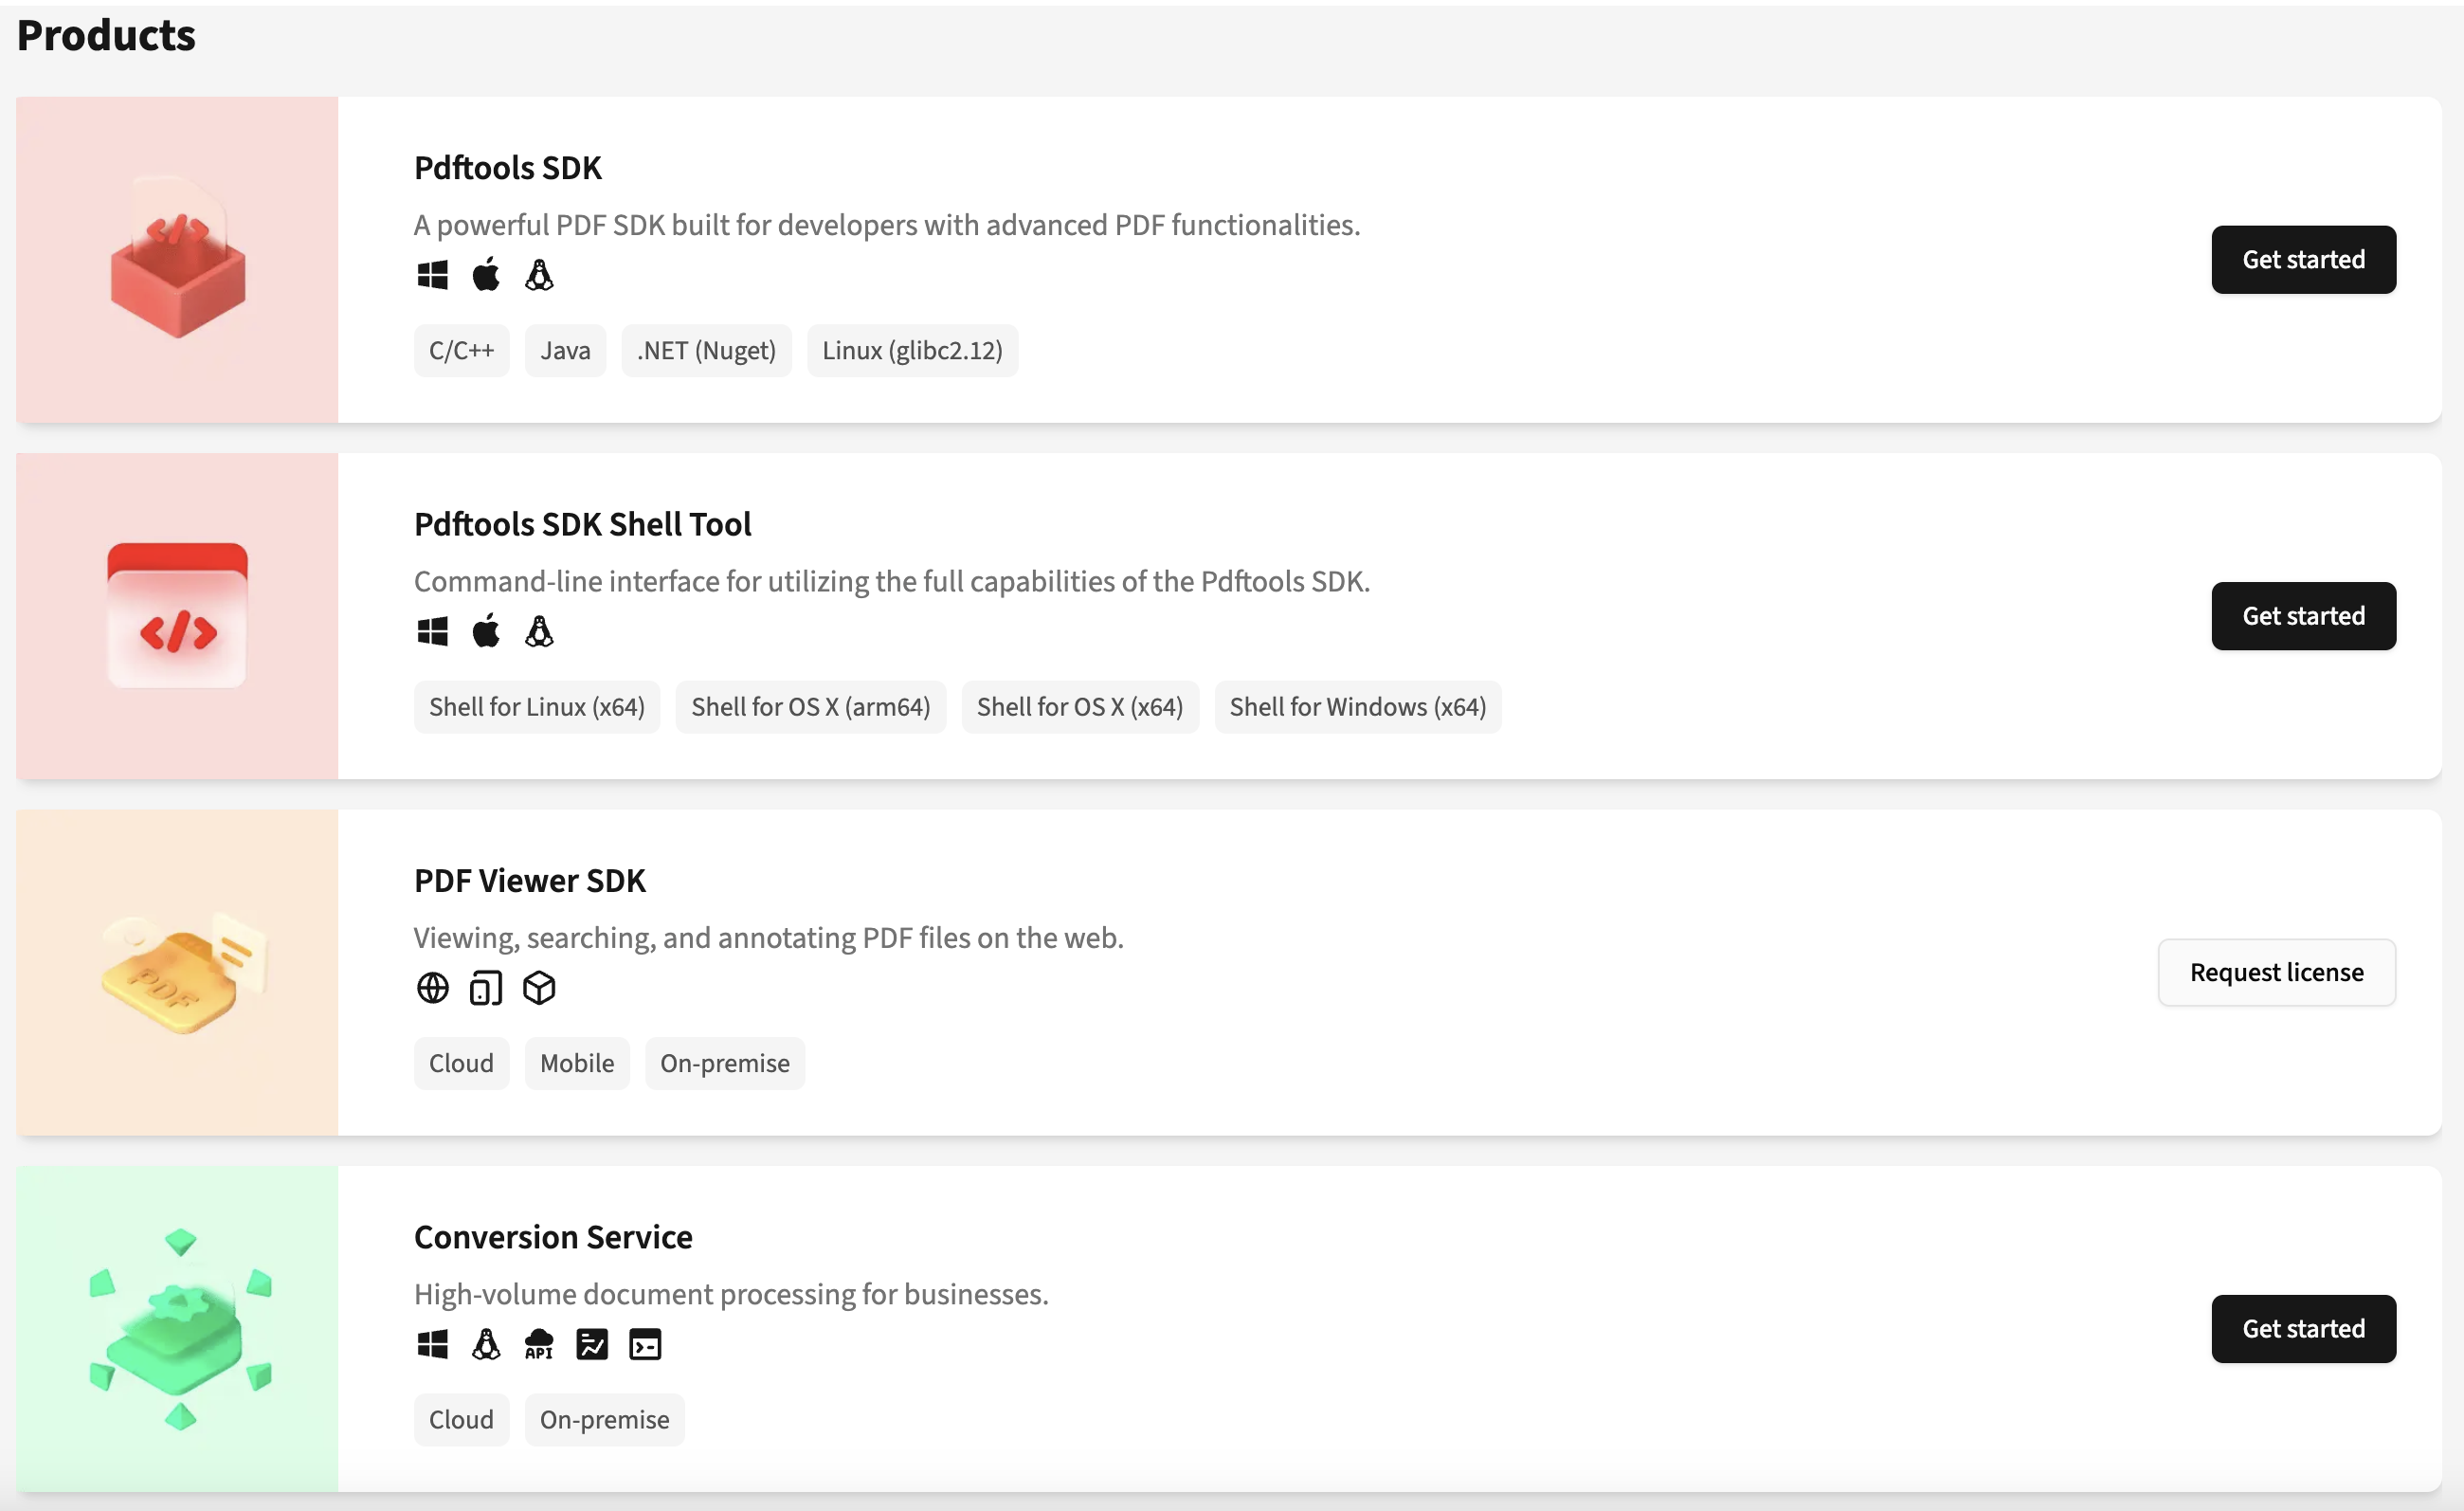
- On the Products page, next to the Conversion Service, click Get started or See product.
- Next to the Conversion Service Trial, click the Copy .

You now have a free trial license key. Its limitations are the following:
- The converted files have a watermark
- The license key is limited to 90 days.
The trial license key is valid for 90 days starting at UTC time. The Pdftools Portal indicates the validity period starting at 89 days (as the consumption of the first day already started). This period may slightly vary depending on your time zone relative to UTC.
Request full license
You can try the Conversion Service for free with a trial license key. In this section, you can learn how to request a full license key.
To request a full license key, follow these steps:
- Sign up or log in to the Pdftools Portal.
- On the Products page, next to the Conversion Service, click Request license.
- On the Contact us window, fill in the requested fields, and then click Submit.
Prerequisites
- You have a Windows Server machine with the following dependencies installed:
Download the installer
To download the Conversion Service installer, follow these steps:
- Log in to the Pdftools Portal.
- On the Products page, next to the Conversion Service, click Get started or See product.
- In Product kits section, find the
ConversionService-VERSION_NUMBER.msipackage, and then click Download . The exact filename, for example,ConversionService-5.7.1.8691.msi, depends on the version you are installing.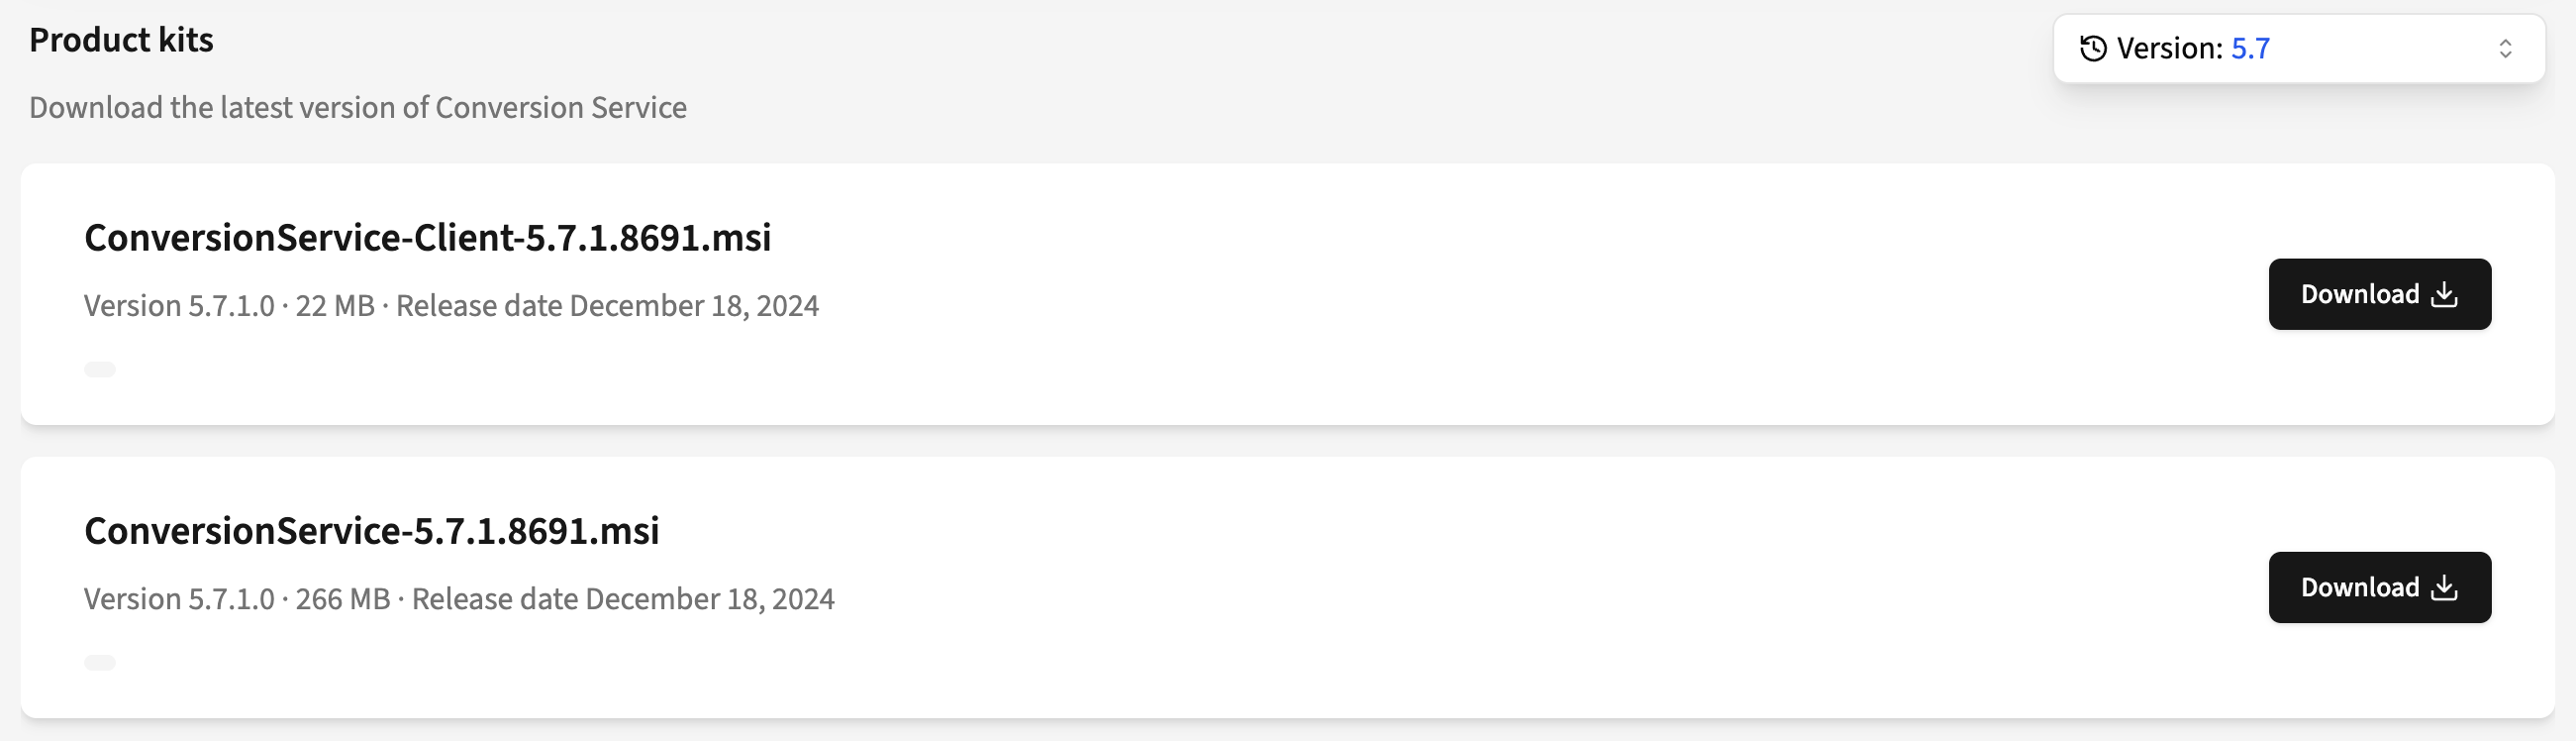
Available installers explained:
- Windows Server: The
ConversionService-VERSION_NUMBER.msiinstalls the Conversion Service itself and provides the following applications that let you configure workflow profiles and more:- Conversion Service Configurator
- PDF Client for Conversion Service
- Conversion Service shell client (CLI)
- Licensing Gateway Service (LGS)
- Windows clients:
ConversionService-Client-VERSION_NUMBER.msito install the following applications:- PDF Client for Conversion Service
- Conversion Service shell client (CLI)
- Office Add-ins
Don't install the ConversionService-Client-VERSION_NUMBER.msi installer on the same machine where you installed the Conversion Service Configurator with the ConversionService-VERSION_NUMBER.msi. Conflicting installations can cause the Conversion Service to stop functioning correctly.
Install the service and activate the license key
To install the Conversion Service and activate the license key, follow these steps:
- Open the
ConversionService-VERSION_NUMBER.msiinstaller and proceed with the guided installation. - Log in to the Pdftools Portal.
- On the Products page, next to the Conversion Service, click Get started or See product.
- Next to the Conversion Service Trial or Active, click the Copy .
- Open Conversion Service Configurator, and then click the License tab.
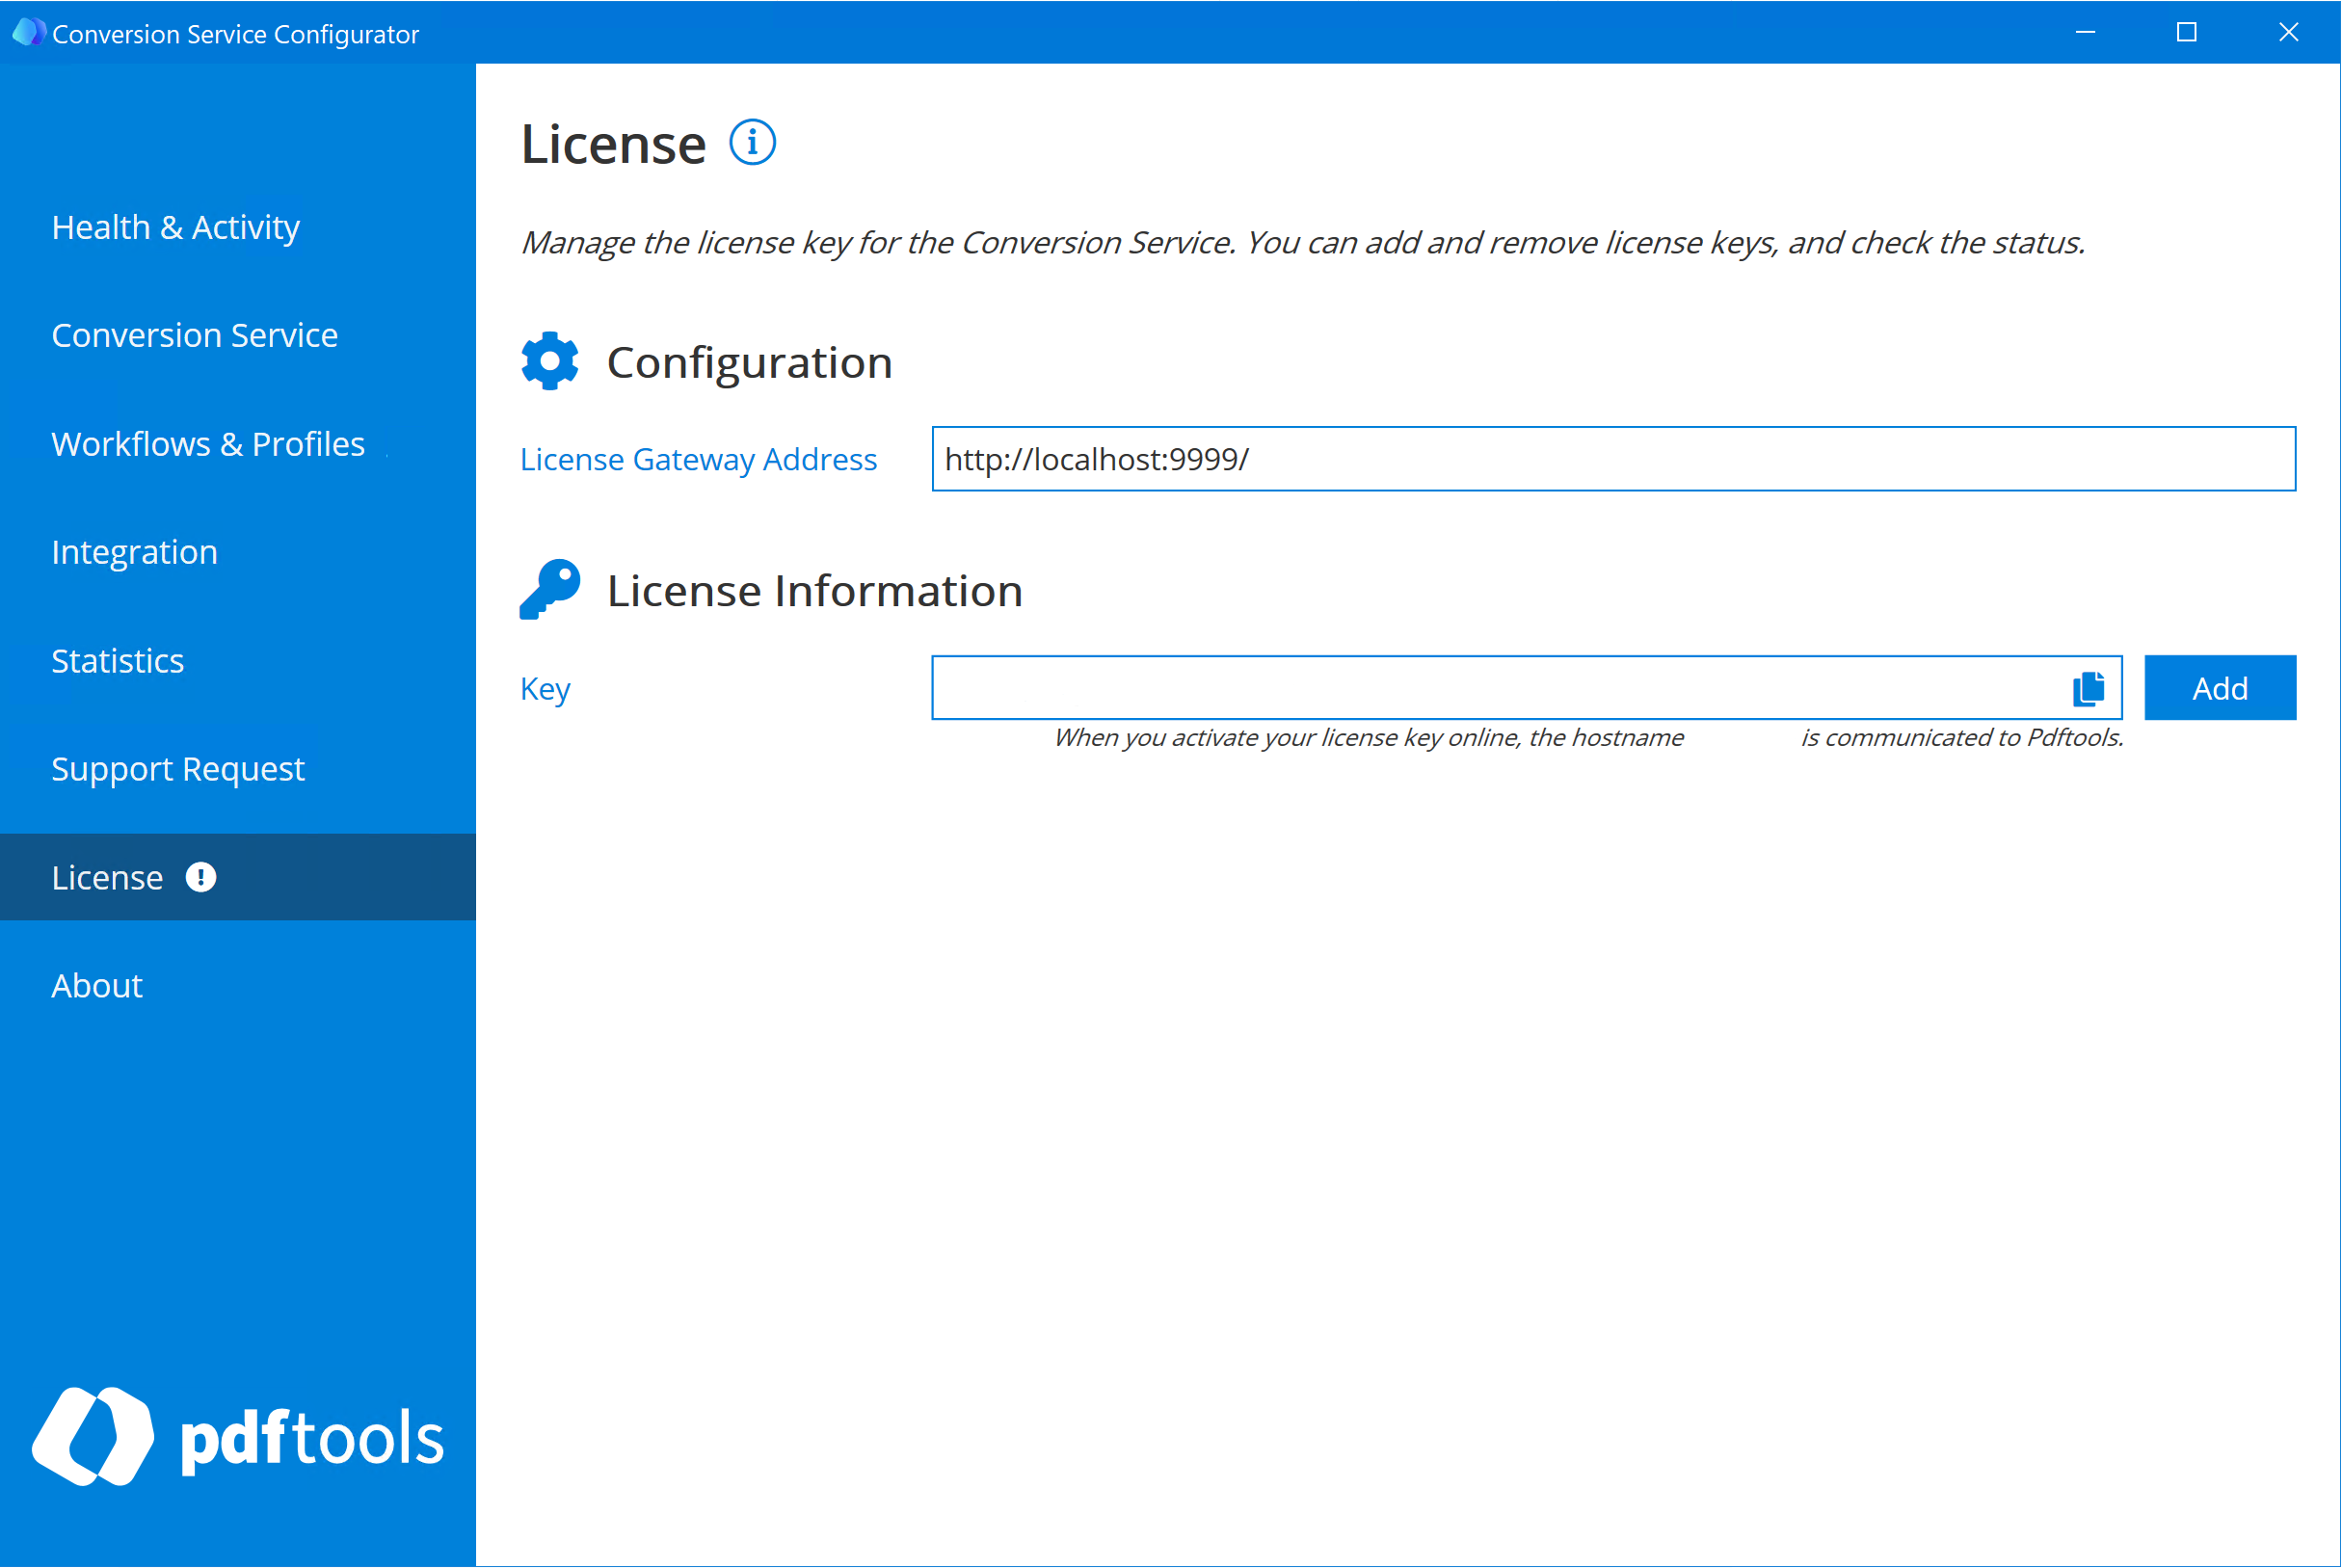
- Paste the license key into the Key field and click Add.
Basics of the Conversion Service
The following sections guide you through the essentials of the Conversion Service. Follow each of these sections step by step:
- Convert a file
- Configure a profile
- Configure Microsoft Office file conversion
- Configure a watched folder
- Convert various files
Convert a file
Convert a PDF file to PDF/A using the default configuration:
- In the PDF Client for Conversion Service, drag a PDF file to the Input box.
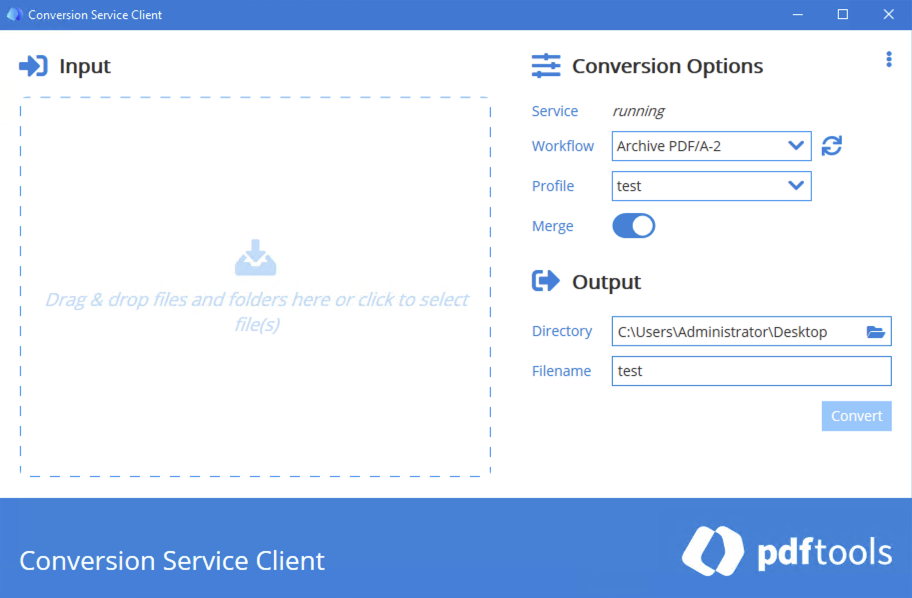
- Click Convert.
In the PDF Client for Conversion Service, you can select workflows and profiles to specify conversion types and change the output filename.
Alternatively, you can also use a shell client to make the same conversion using the default profile:
-
In a command prompt, issue the following command:
pdfclient input.pdf output.pdfThe
input.pdffile is located on your machine, andoutput.pdfis the name of the generated PDF. The output file is saved in the same directory where you are currently working with the shell client.
You can find the data about your successful conversion in log files. These files are saved by default in the C:\ProgramData\Pdftools\Conversion Service\Logs folder. The Conversion Service uses several different log files:
ConversionService-Service.log: Main service log file (current).ConversionService-Service-DATE.log: Past service logs.ConversionService-Connections.log: For any Connector services, such as Watched Folder, email connectors, or REST connectors.ConversionService-Configurator.log: For the Conversion Service Configurator application.
For more information, review Service log documentation.
Configure a profile
Configure a custom profile to add a stamp to converted documents:
-
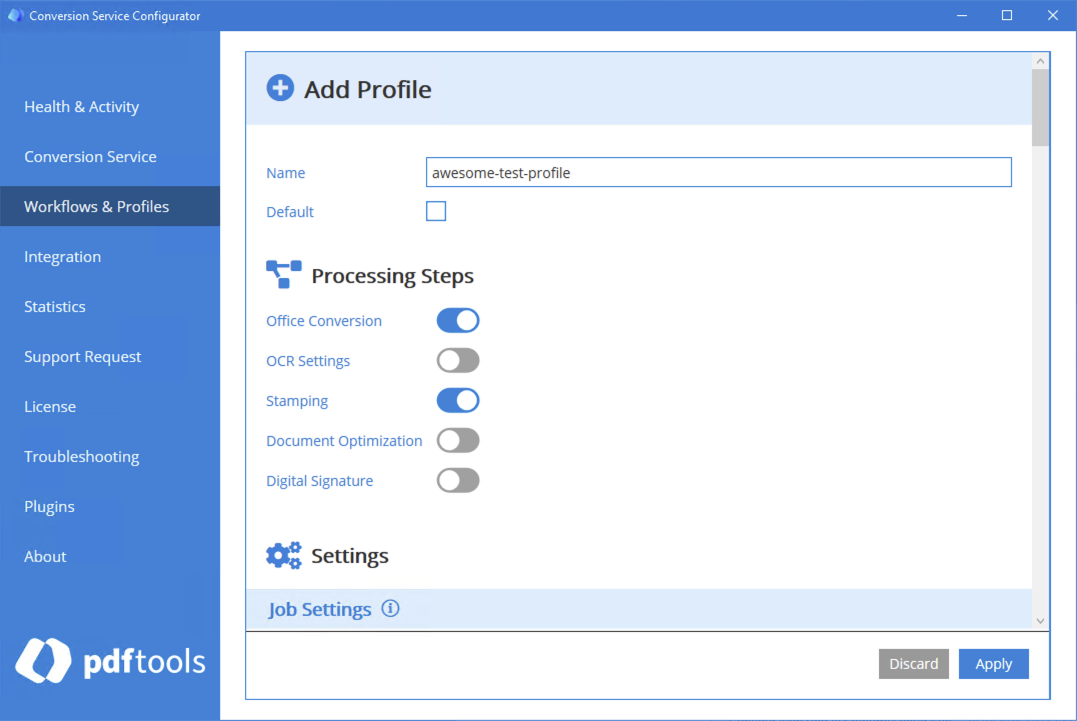
In the Conversion Service Configurator, go to Workflows & Profiles.
-
Next to Archive PDF/A-2, click Add.
-
Create a name for the new profile. For example: awesome-test-profile
-
In the Processing Steps section, enable the Stamp and Annotation toggle.
-
Scroll down to the Stamp and Annotation section, and then click Add item.

-
Click Text Stamp, and then click Next.
-
In the Text field, enter a stamp text. For example: Hello world
-
Optional: To display the stamp in the upper right corder of the PDF file, scroll down to Layout section, and edit the parameters as follows:
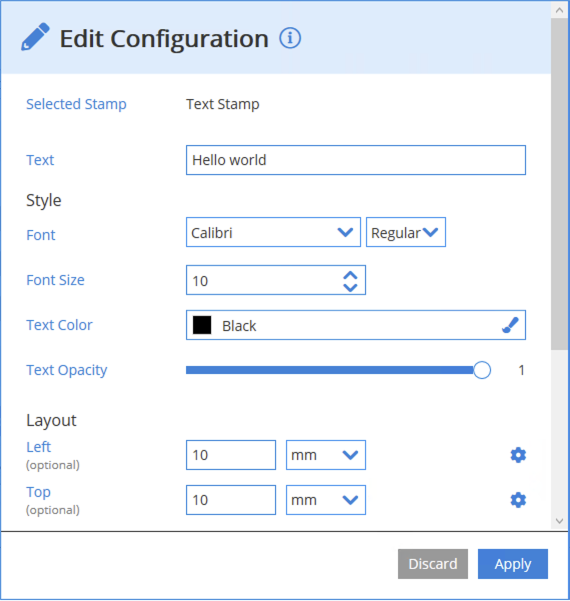
If you don't specify any values in the Layout section, the stamp is displayed in the centre of the page.
-
Click Apply, then click Apply in the Configurator again.
-
In the Changes detected dialog box, click Save & Restart Service.
-
In the PDF Client for Conversion Service, drag a PDF file to the Input box.
-
In the Profile drop-down list, select a created custom profile. For example: awesome-test-profile
-
Click Convert.
Install the fonts you selected for the text stamp or text annotation on your server machine. For example, Calibri fonts are selected for text stamps within the Configurator by default, but you must install the Calibri font family to finish the processing successfully.
You learned to configure your custom profile for Archive PDF/A-2 workflow, and add a configured stamp on converted documents.
Configure Microsoft Office file conversion
To convert Microsoft Word, Excel, and PowerPoint files to PDF files with the Conversion Service, you need a valid Microsoft 365 for Business license. For Microsoft Office file conversion, we recommend using the English (en-US) version of the operating system. To enable Microsoft Office file conversion in the Conversion Service, issue the following steps:
-
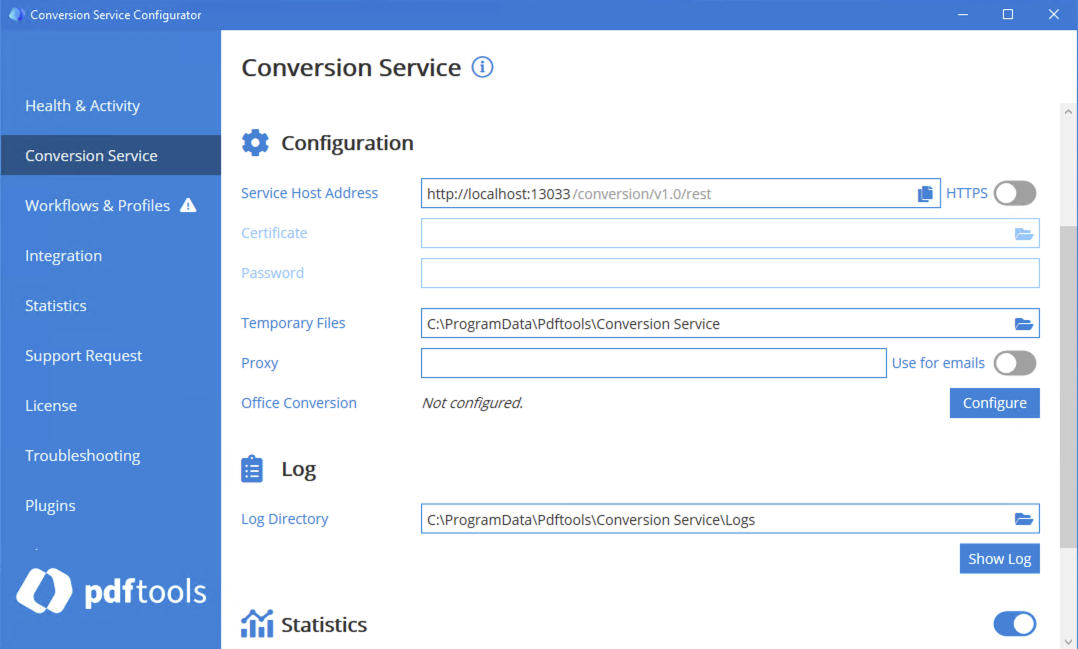
In the Conversion Service Configurator, go to Conversion Service tab, and then scroll to the Configuration section.
-
Next to the Office Conversion, click Configure, from the displayed window, select Local Office Installation and Automatically Create a User Account, and then click Next.

This option creates a user account with pre-configured settings. For detailed information about all available configuration options, review Convert Microsoft Office files.
-
Click Apply, and then in the Changes detected dialog box, click Save & Restart Service.
-
In the PDF Client for Conversion Service, click the Profile drop-down list, and then select a profile where Office conversion is used. For example, awesome-test-profile.
-
Drag a Microsoft Office file to the Input box.
-
Click Convert.
You learned how to configure Microsoft Office file conversion in the Conversion Service.
If you experience any issues during configuration or conversion, refer to the Troubleshooting in the Convert Microsoft Office files documentation.
Watched folder
A watched folder automatically processes files placed into it. When you drop files into a watched folder, the Conversion Service detects them, processes them according to your configured workflow and profile settings, and then outputs the converted files to a designated location.
Configure a watched folder
Automatically convert all documents every time a file is included in the specified folder called a watched folder. To integrate a watched folder, follow these steps:
- In the Conversion Service Configurator, go to Integration, and then click Add.
- Name the integration. For example: my-custom-watched-folder.
- Select Archive PDF/A-2 as a workflow, and then select a profile. You can use the profile we have previously created in this getting started guide. For example: awesome-test-profile
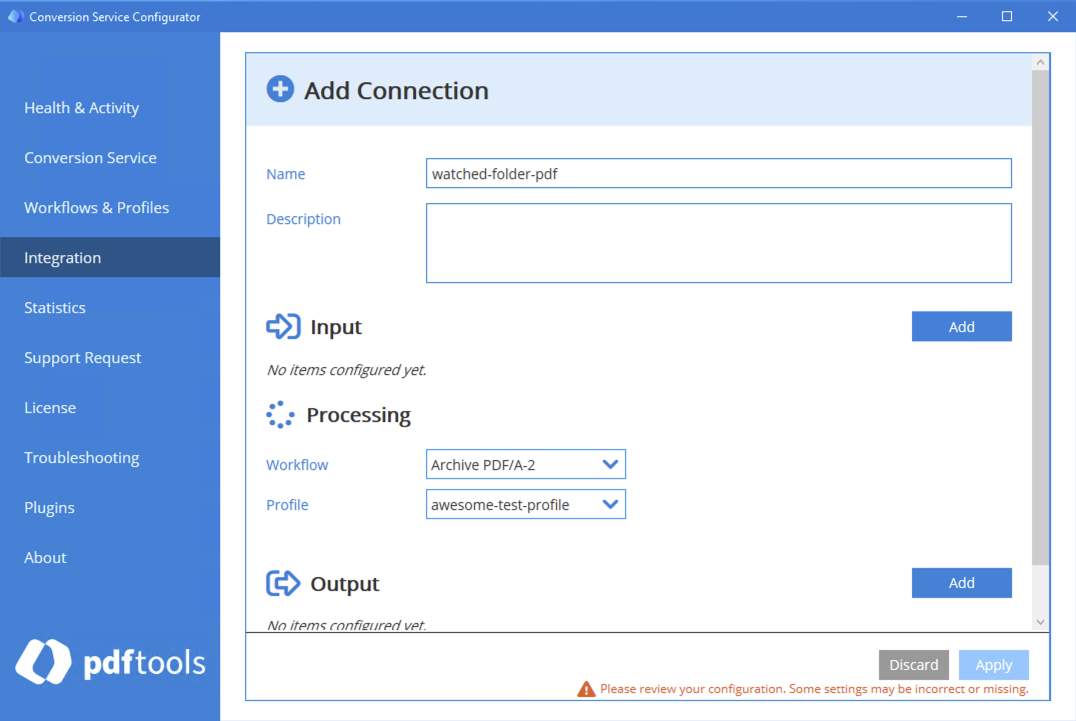
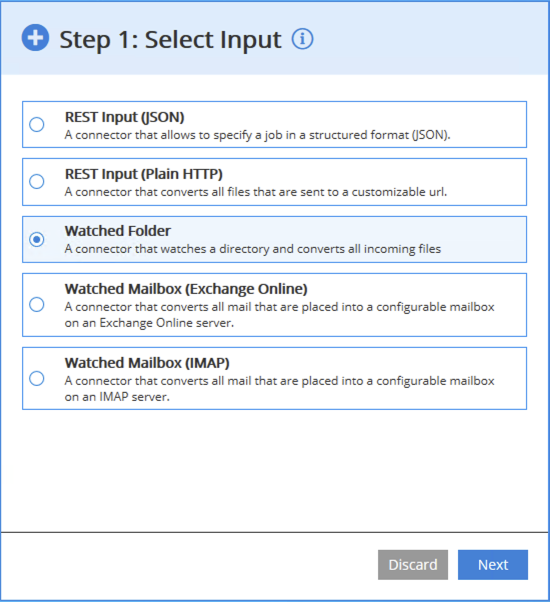
- Click Input, and then select the Watched Folder and click Next.
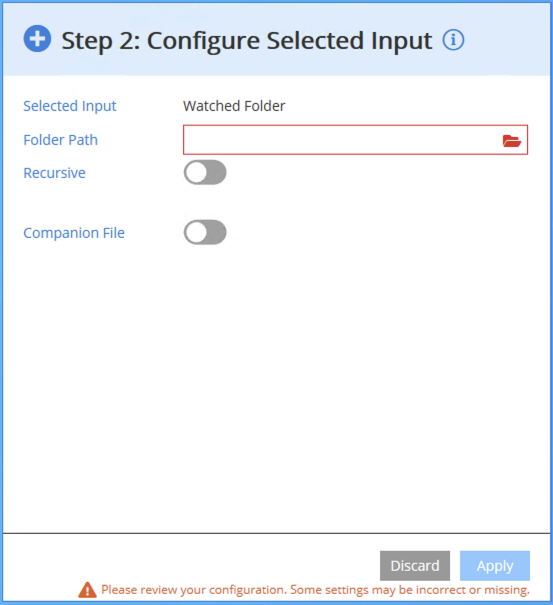
- Select an input folder path, and then click Apply.
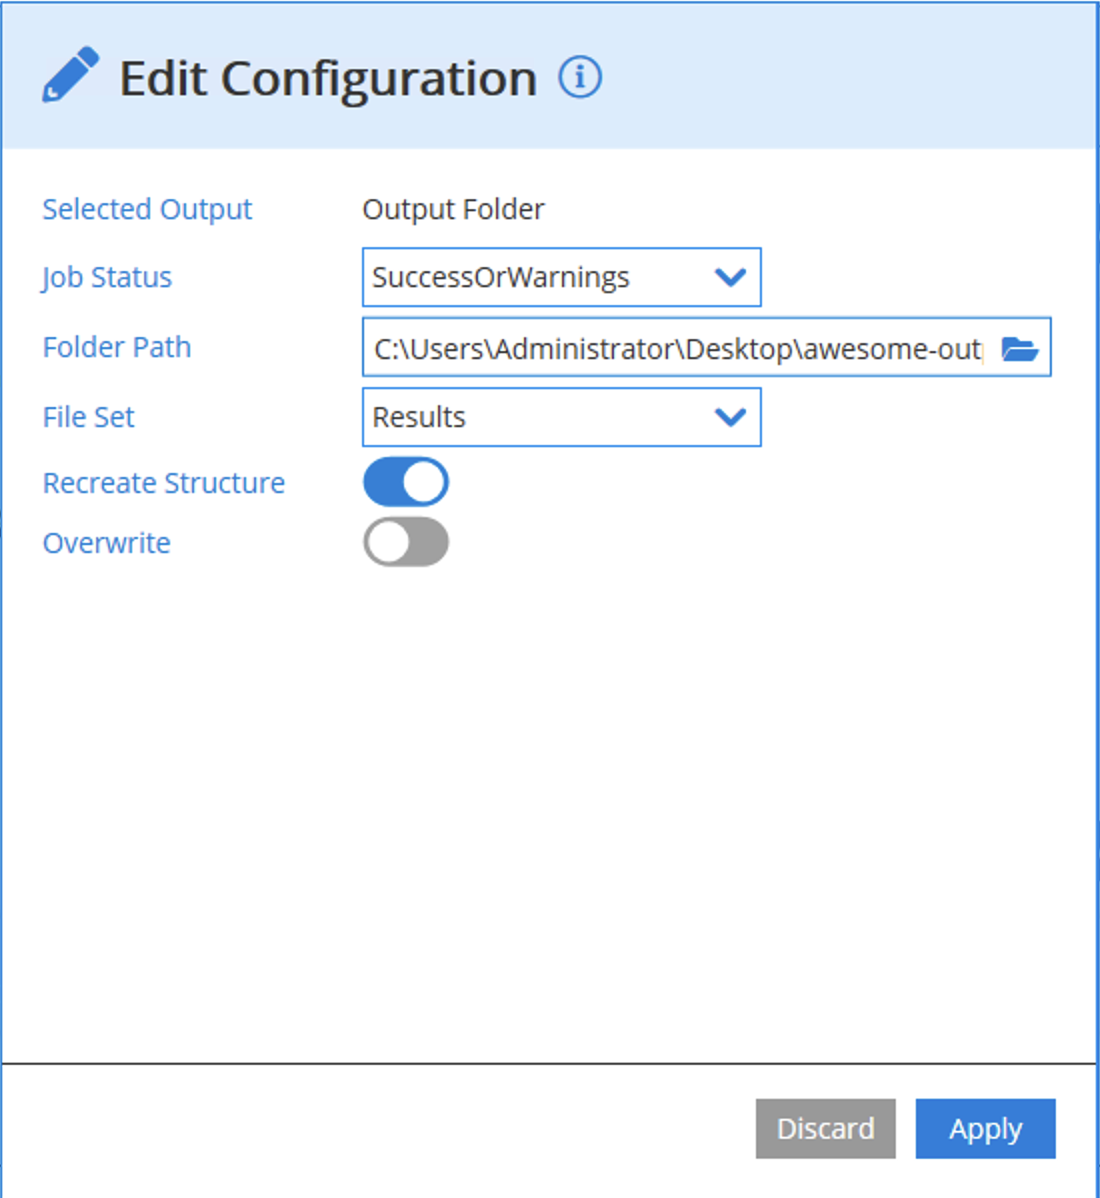
- Click Output, and then select the Output Folder and click Next.
- Select the output folder path, and then click Apply.
- Click Apply again.
- In the Changes detected dialog box, click Save & Restart Service.
When you include PDF files in the watched folder, the Conversion Service automatically converts them using the selected workflow and profile and copies them to the output folder. In this case, the awesome-test-profile example added a stamp and converted PDF files to PDF/A-2.
Convert various files
The Conversion Service is designed to convert as many file formats as possible into selected output formats. Use it to convert various files:
- In the PDF Client for Conversion Service, drop various files to the Drag & drop files and folders here or click to select
file(s) section. For example:
- PNG image
- JPEG image
- An EML (email message file)
- A PDF file
- An XML file
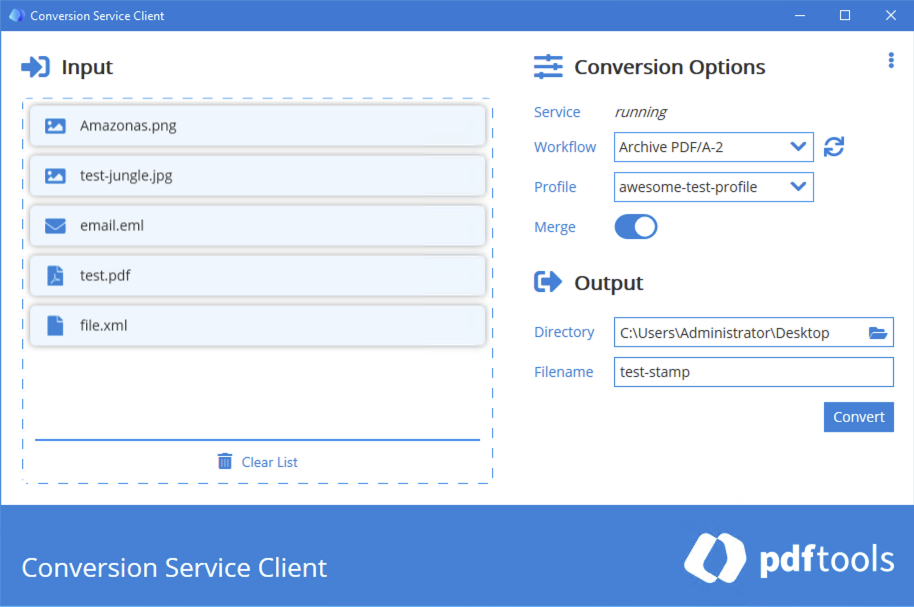
- Optional: Enable the Merge toggle to merge all converted files into one.
- Click Convert.
If you enabled the Merge toggle, the Conversion Service created a PDF/A-2 with all the files nested as the portfolio files.
Optional: Install and configure additional clients
After installing the Conversion Service on a Windows Server machine, you can install additional clients on other Windows machines in your network. In this configuration, users in your network send files for processing to the Conversion Service running on your server. The files are automatically processed and sent back to the client machines.
Note that the ConversionService-VERSION_NUMBER.msi you installed in the previous section already includes the PDF Client for Conversion Service, which you can run on your server machine. Here you can learn how to install and run a client on other machines connected to your server.
- Log in to the Pdftools Portal.
- On the Products page, next to the Conversion Service, click Get started or See product.
- In Product kits section, find the
ConversionService-Client-VERSION_NUMBER.msipackage, and then click Download . The exact filename, for example,ConversionService-Client-5.7.1.8691.msi, depends on the version you are installing. - Connect the clients to your Conversion Service running on a server:
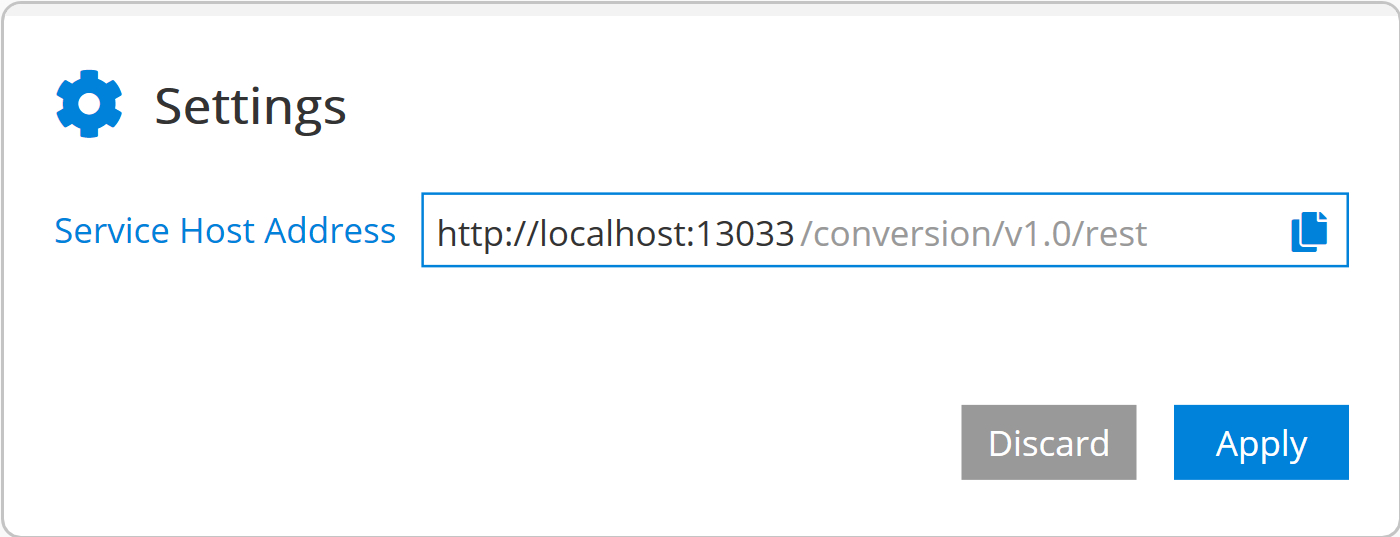
- In the PDF Client for Conversion Service, click the three vertical dots , and then Settings.
- In the Service Host Address field, insert the IP address or name of the server machine where the Conversion Service is installed.
For more configuration options for this client, review PDF Client for Conversion Service documentation.
Next steps
You learned how to run the Conversion Service in Docker, create and export a custom profile, and convert a file using PDF Client for Conversion Service. Review the following documentation for more details:
- Set up the service depending on your installation.
- Adapt the default profile or create a new profile for a workflow.
- Create a new workflow
There are also several ways how to integrate the Conversion Service into your system: